Over View

PART 1

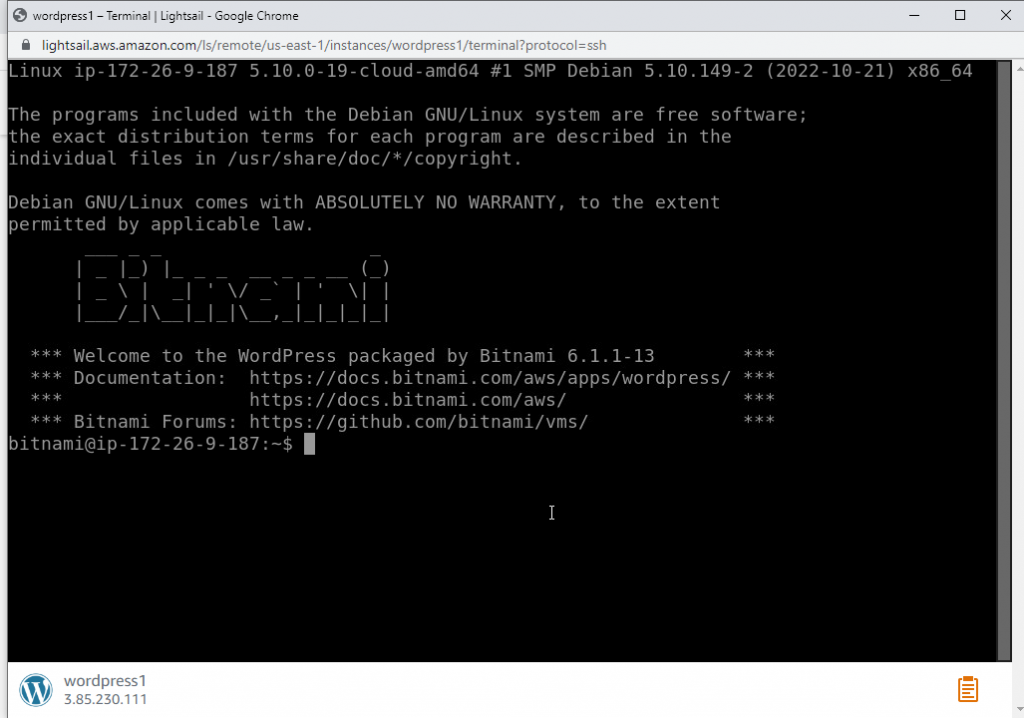
First, we need to create our Lightsale Instance. Lightsale allows us to deploy serverless applications. In this case, that app will be WordPress. I’m choosing to run this on a Linux operating system.
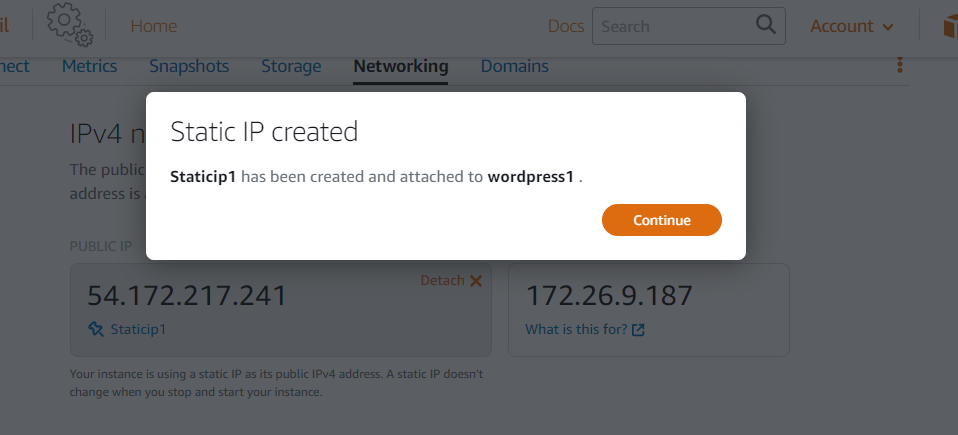
Now we have to assign a static IP address to the Lightsale instance. It’s currently using a dynamic one, and this isn’t something you want for a website IP address because it can change.
PART 2
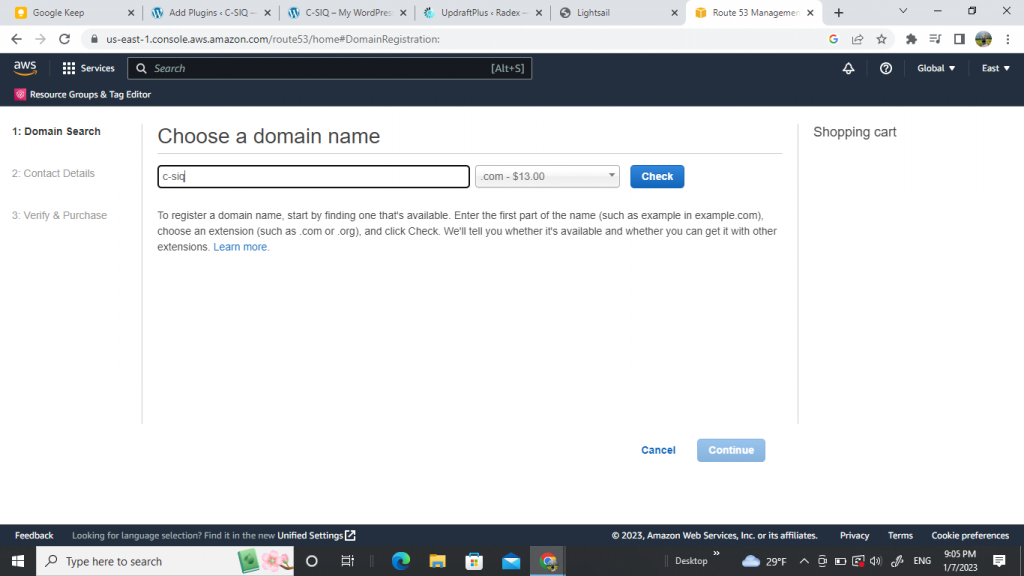
In Route 53 register or transfer a domain to host the website on.
PART 3
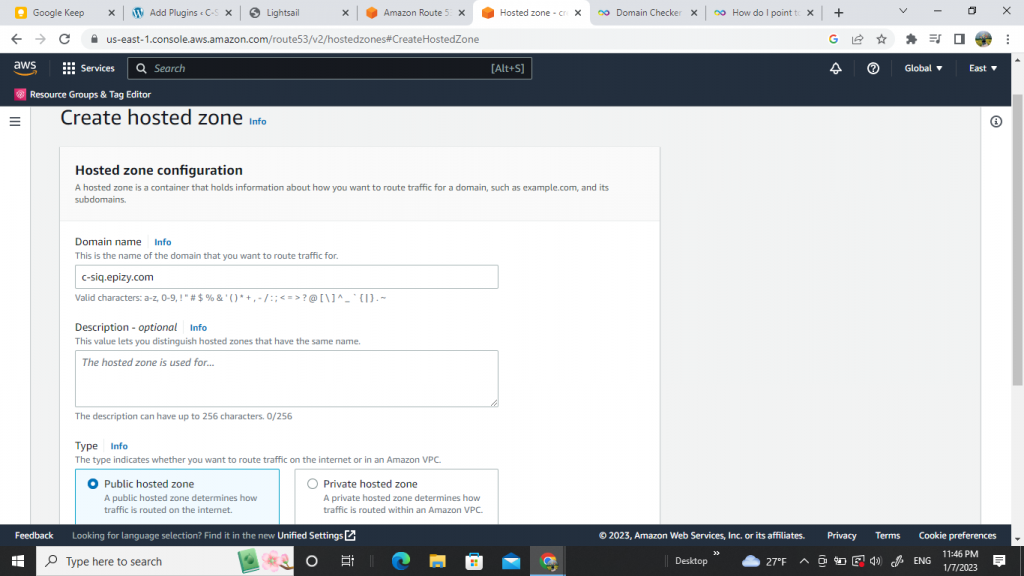
While still in Route 53 select Hosted Zones, create one, and enter your domain name. If you chose to transfer a domain you will have to plug in your host’s name servers.
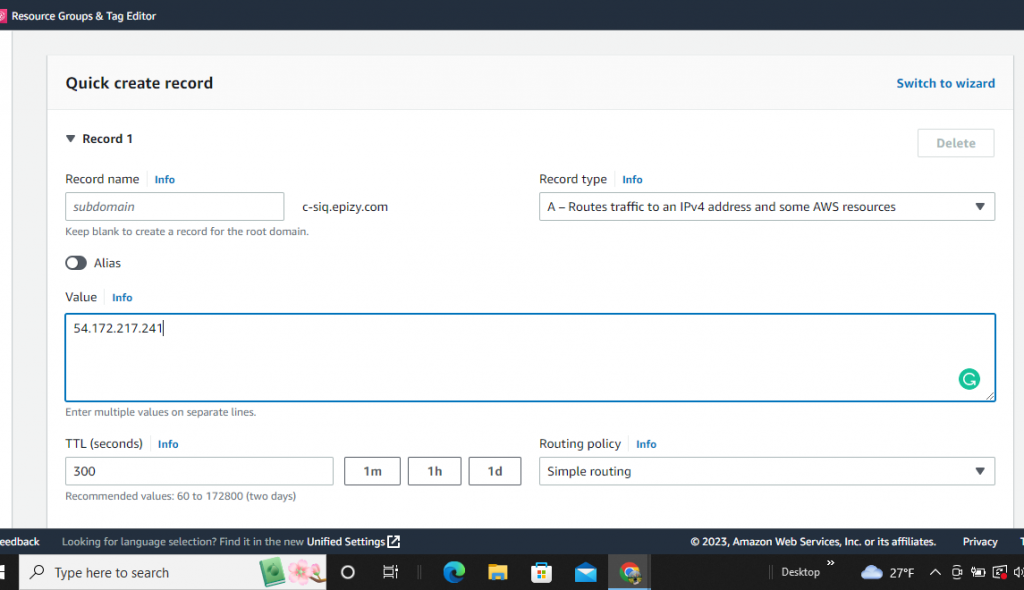
After you’ve created the hosted zone you will see two records populate automatically, the type NS (name server) and SOA (start of authority). Now create a new record, For this one leave the name blank, select the A record type, and for the value input your static IP address connected to Lightsale from part 1.
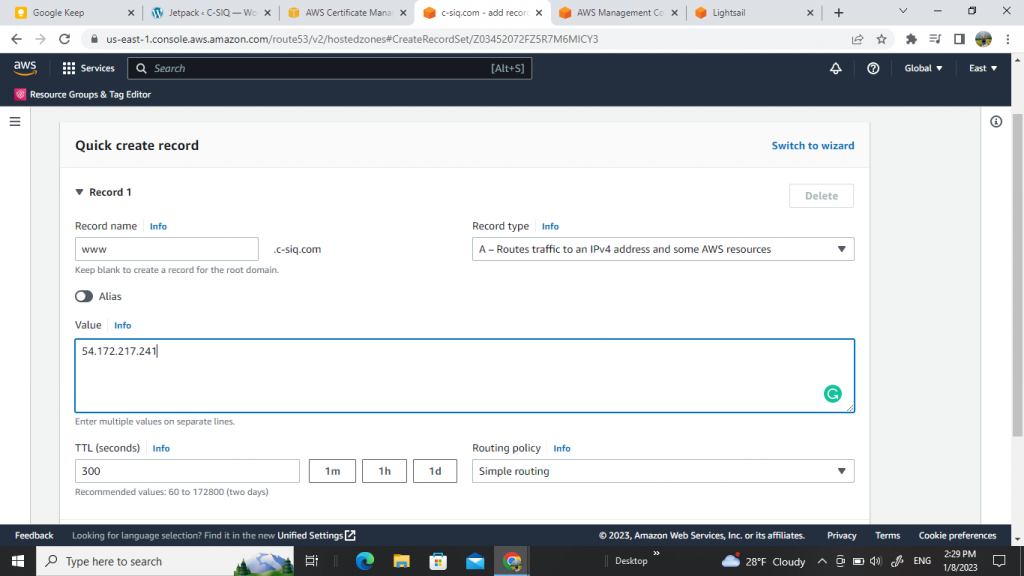
Now create a second one with all the same settings except this time use www as the name.
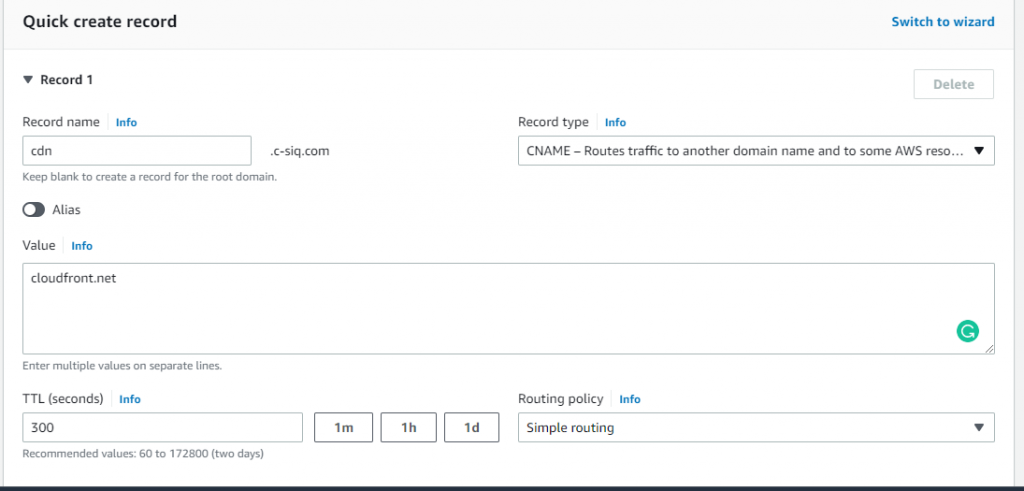
For the last record enter cdn as the name, CNAME as the record type, and cloudfront.net as the value. This record is for content delivery.

Go to yourdomainname/wpadmin and enter the username and password generated by BItnami to access your WordPress admin. After you sign in it is a good practice to change this login information to something specific to you.
PART 4

Now go to AWS Certificate Manager and request an SSL certificate for your site.

Connect your domain name to the SSL Certificate along two other versions of the domain name. One with www. and the other with cdn. followed by your domain (Just like the records we created earlier in part 3). The purpose of the CDN (Content Deliver Network) is to publish media files stored in the s3 bucket which we will create shortly.
PART 5
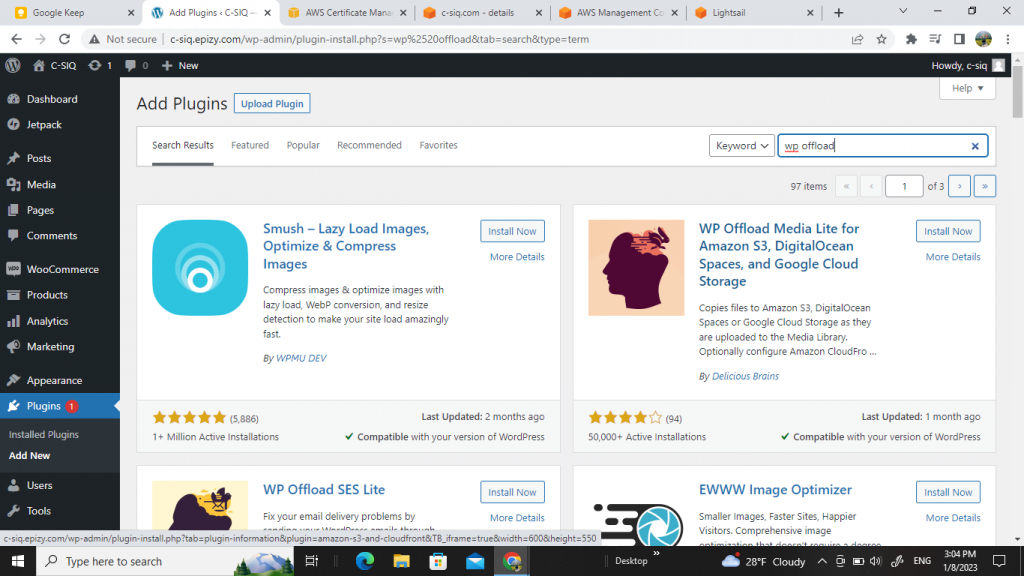
Now we need to install a word press plugin that will allow us to connect our website content to our s3 bucket. In this case, I’m using WP Offload.
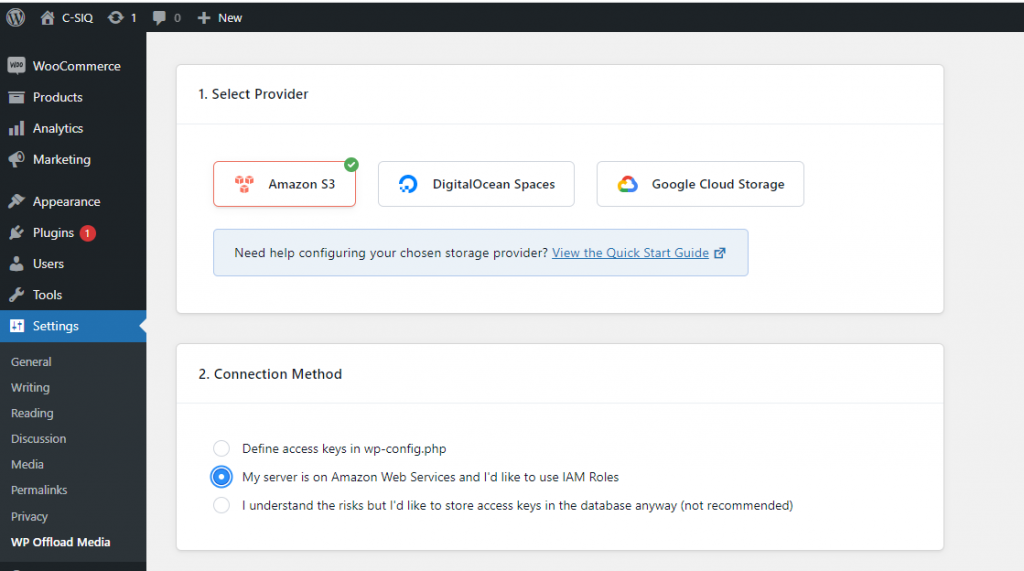
In WP Offload choose Amazon s3, for the connection method use IAM Roles.
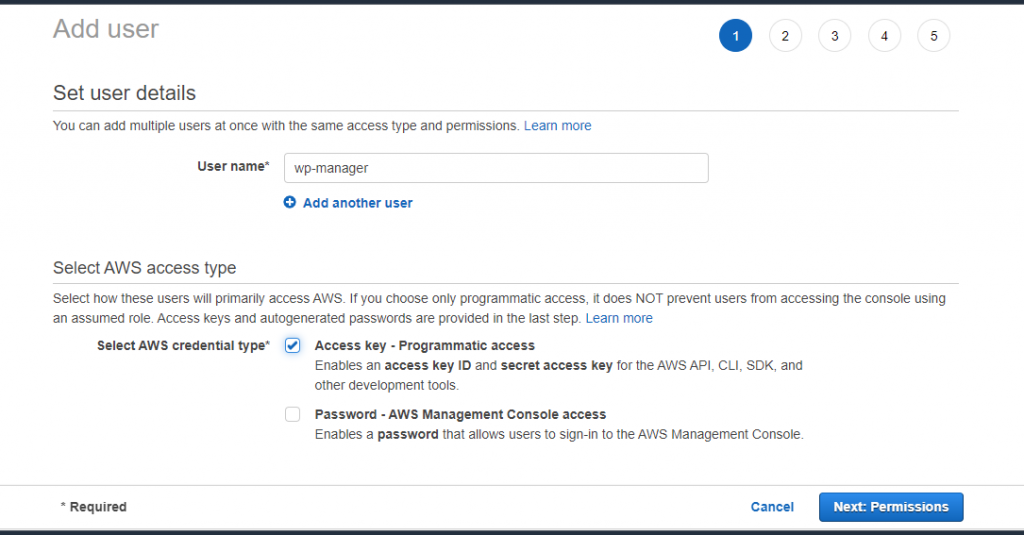
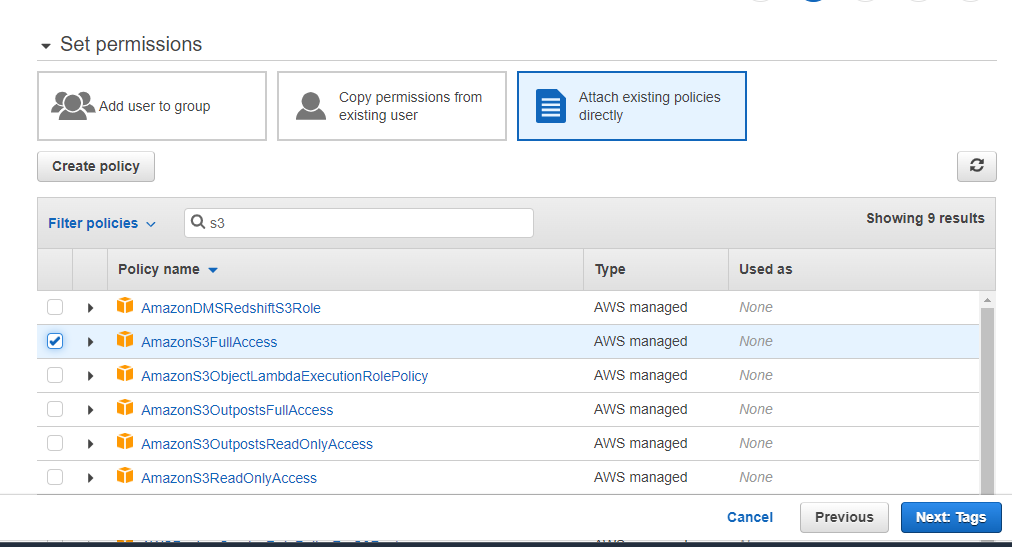
Now back in AWS create an IAM user and grant it programmatic access to AmazonS3.
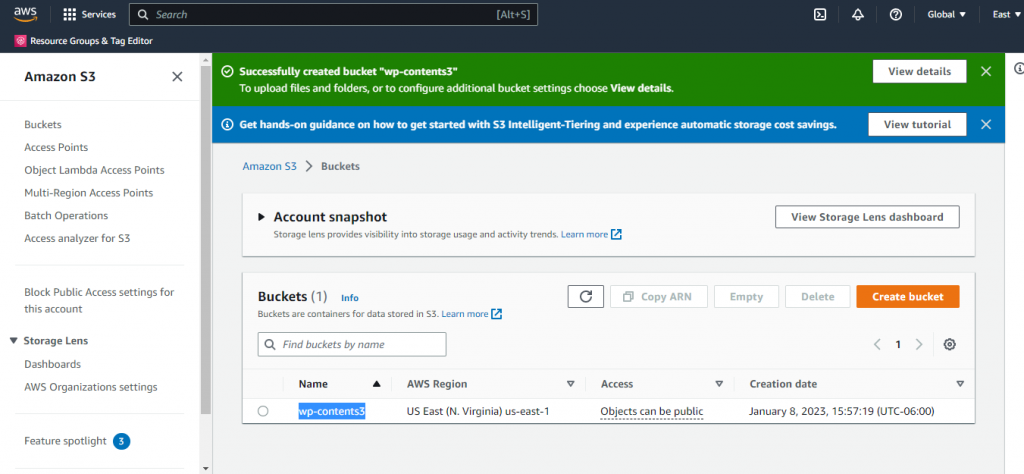
Now finally create a new bucket in Amazon S3.
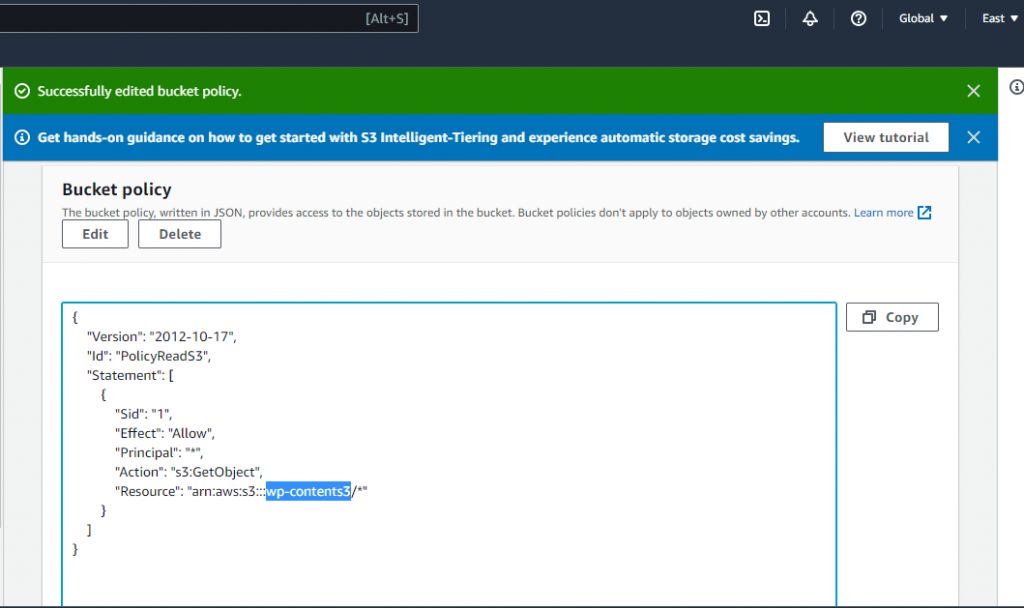
Within the bucket permissions enter this policy and change the resource to whatever you named your bucket. Project Code Copy/Paste
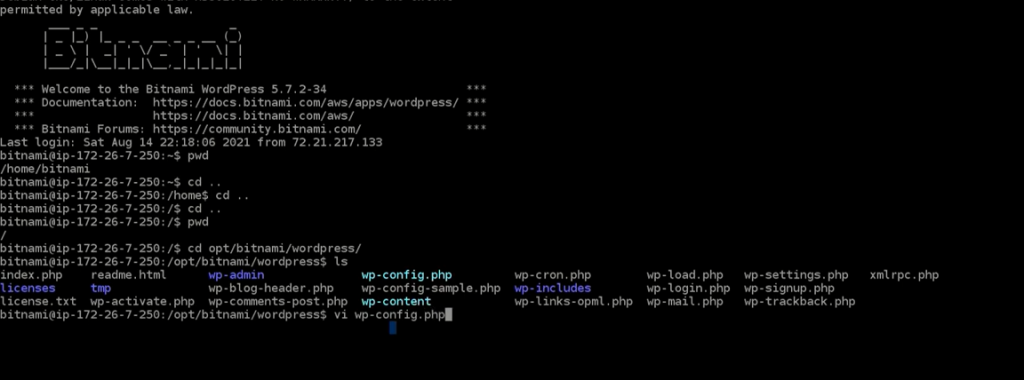
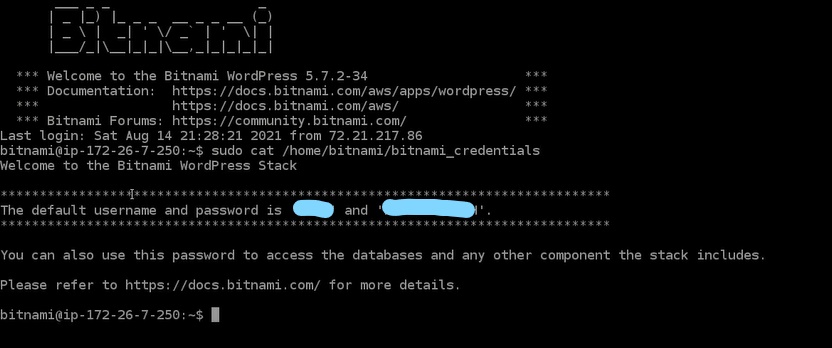
In Bitnami go to the location where WordPress is installed, the information colored in blue is the WordPress contents. once your CLI looks like this picture type wp-config.php and press enter. To configure your AWS credentials in WordPress you will have to paste code number 1 or 2 from the project code. Replace the asterisks in the code with the IAM user credentials.

PART 6
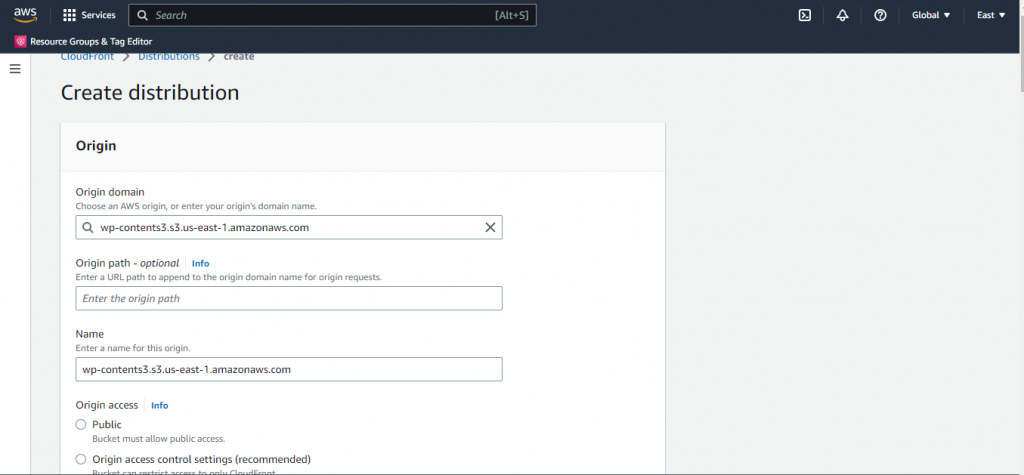
Now go to CloudFront and create a distribution. For the origin choose the S3 bucket we created earlier. This origin is where CloudFront will take content to deliver it to end users. Generate an OAI and choose yes for update bucket policy.
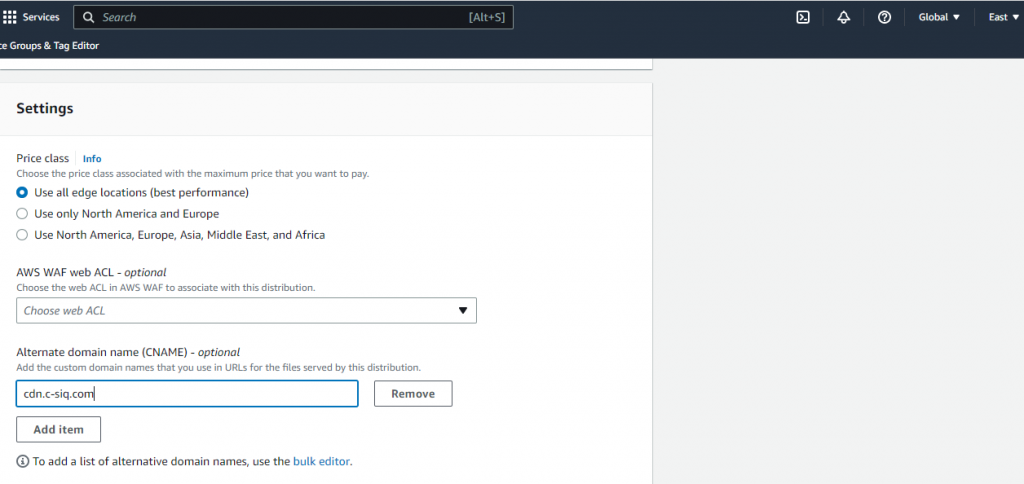
For the alternate domain name add the CDN domain we created earlier.

In the WP Offload plugin change the delivery provider from S3 to CloudFront. Also add you cdn domain name to the custom domain section. In advanced options, you can choose to remove files from the server to prevent your WordPress server from being overloaded with unneeded files.
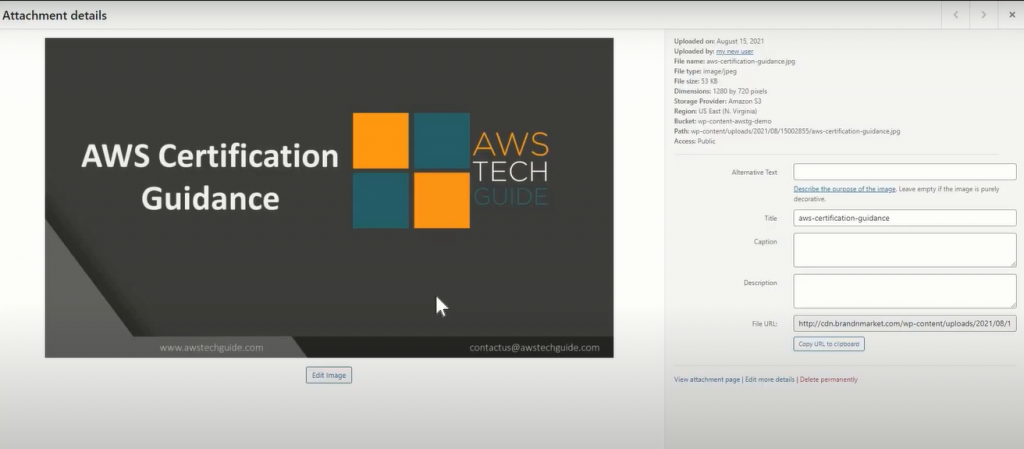
Finally, upload media to your WordPress site and if the file URL is linked to your s3 bucket everything is working correctly and you are all set!
I’m really impressed togethrr with you writing talents ass well as with thee structure to your blog.
Is this a paid topic or did you customize it yourself? Anyway stay up the nice high quality writing, it’s
uncommoon tto peer a nice weblog like this one nowadays.. https://www.waste-ndc.pro/community/profile/tressa79906983/